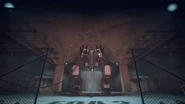
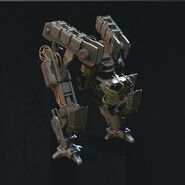
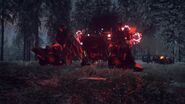
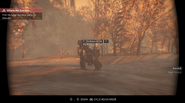
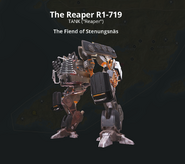
The Stridsmaskin 90 "Liemannen" (ENG: Fighting Machine 90 "The Grim Reaper"), otherwise known as the Reaper, is an offshoot of the Tank. It is the only boss character in Generation Zero so far.
Reapers are undoubtedly the most dangerous Machine in the game, using a slew of Apocalypse-type weapons, an impenetrable shield system, a large health pool, and a destructive signature attack - The Thermobaric Explosion - that deals a large amount of damage, instantly killing players and small Machines in a 150 meter radius.
Physiology[]
Being based on Tanks, Reapers share almost all of the same anatomy. The key differences are that Reapers have more armor with a more "geometric" aesthetic to it, an all-black coat of paint, yellow wires, and a slightly larger size. They stand approximately 9 meters high.
Spawning the Reaper[]
The Reaper counts as a Rival. Therefore, when trying to get it to spawn, there are a few things to consider:
- A region must be level 21 or higher in order for the Reaper to spawn.
- A region can be leveled up by killing machines in it.
- You can check the region level by opening your map and hovering over the region you want to spawn it in. In the bottom right, a small window with information about current region level and the amount of rivals currently assigned to this region. Note that rivals are able to wander around and will not always physically be in the region they belong to.
- Killing any rival will decrease the level of the region it is assigned to. In order to level up the region effectively, rivals must be avoided.
- Good regions to spawn a Reaper in are the Mountains, Farmlands, North Coast and Himfjäll Island (Alpine Unrest DLC required). These are large regions, which makes it easy to avoid existing rivals, while spawning high class machines, which level up the region fast.
- After hitting level 21 on a region, every rival spawned has a chance to be the Reaper. This chance increases with every further region level, peaking at the current maximum level of 25.
- The maximum amount of rivals that can spawn is 8 per region. That means if there are already 8 normal rivals in the region, the Reaper will not spawn.
- There can only be one Reaper at a time. After one spawns, it needs to be killed before another can spawn.
- There is a 1 hour cooldown per region between Reaper spawns, meaning it is possible to immediately spawn a second Reaper in the same region after killing the first one if the first one spawned over an hour before it was killed.
Abilities[]
Loadout: "Cataclysm"
Apocalypse Tick Deployment
- The Reaper will deploy an army of Apocalypse Class "Stinger" Ticks. This is a skill it will not use often.
Biochemical gas
- A cloud of purple gas is released and damages players in a ca. 15m radius over time, whilst also afflicting them with venom. This will only be activated if players move too close. (In the profile tab under eye wear apparel you can equip a gas mask that increases your gas resistance by 40 points, also under the skills tab in the combat tree the third level armor skill give you an extra 10% gas damage resistance against machines, the vanguard specialization in the combat tree can also increases your overall damage resistance by 25%, also note that gas damage can stack.)
Radiated missiles
- The Reaper will release a barrage of missiles into the direction of a player that attracted its attention. In addition to the explosion of the missiles in the target area, this attack also contaminates the target area for a while, damaging players over time. The contaminated areas will turn green, so it's fairly easy to stay away from them.
Incendiary machine gun
- The Reaper's main weapon is a Heavy Machine Gun with an extremely high rate of fire and incendiary rounds. It targets one player and then shoots in their direction. If any of the shots hit, the player will start to burn and take some damage over time.
Anti-weapons shield
- A red sparking shield envelops the Reaper most of the time. While this is active, it can not be damaged. The four shield emitters can be destroyed, at which point the shield will not appear anymore, although it will still activate during thermobaric explosions.
Thermobaric explosion
- This is the Reaper's signature and most dangerous weapon. It emits a distinct siren signal for several seconds, instantly arm its shield (even if all shield generators are destroyed), then expels a huge cloud of green gas around itself in an approximate 120m-radius circle. After the gas is finished dispensing, the Reaper will ignite the gas, creating a huge shockwave that will instantly kill any player (and any other machine) that is in-range or not behind cover. This attack is not survivable regardless of what skills or equipment the player has--there is absolutely no way to take damage from it and live.
- Reapers can also use the Thermobaric Explosion to self-destruct once its health gets too low. This will be indicated by red gas leaving its body as it charges the attack up and a different, unique siren sound. The shield will not appear during this specific attack.
- Unlike gas everywhere else in the game, the green gas from the Thermobaric Explosion will not damage the player.
FNIX Runner Deployment
- Right after using the Thermobaric Explosion, the Reaper will deploy an army of high class Runners via drop pods.
Shockwave Stomp
- It stomps its foot, damaging players in a small radius around the foot used. It only uses this move if players move too close.
Melee Rush
- The Reaper runs towards a player, damaging any players in its way with each step. It can perform this move anytime, but is commonly used when both weapons are shot off the Reaper. It will also use this to rush towards a Seeker that has spotted the player and alerted the Reaper about their presence.
Weak Spots[]
Being a modified Tank-class machine, the Reaper has most of the same hardpoint components and spots as its prior iteration.
The Reaper has 4 shield emitters, one on each knee (outer side) and one on each shoulder. They are most easily visible when its shield is up, making them glow and spark red. These should be taken out first, as destroying all four renders the Reaper unable to use it's shield, cutting the time it takes to kill it by a considerable amount.
The HMG and mortar on its underside can also be shot off, preventing it from using hard-to-predict attacks and forcing it to rely on melee and gas attacks. It could be advisable to only shoot off the HMG, as dodging the rocket barrage is pretty easy and the Reaper will start relying on that instead of constantly running towards players, which would make it a harder target.
The head protection (three thick plates which come off at once) can be shot off, but it will take a lot of ammo. After that, the underlying components can be shot for very high damage. The sensor on the top right (player view), usually red when engaged, can be destroyed.
Damaging the hinge at the very top of its head is an easy target if attacked from above, its armor is comparably low. A small quadratic plate just below that top hinge on the back is also a critical hit point.
There is a bolted square above the "knee pads" armor on the front of the Reaper's legs. If the armor is shot off, there is a metal beam in the leg, between the square and the knee joint that is a weak point easily accessible from the front. Usually easier to hit if you are slightly elevated, like in a second story house, church tower, or on a hill.
The Reaper, like the Tank, has a fuel tank on its back as well as a battery pack above the fuel tank. Get behind it, most easily done while a friend is distracting it, and take them out while the shield is down.
Strategy[]
Taking on a Reaper by oneself is discouraged, a team of players should be used instead ( if you want to ). The Reaper's weapons can easily take out a group of players too close to each other, so players should split up & surround the Reaper such as to attack from different directions, as it cannot focus on more than one target at once ( except: Thermobaric explosion attack ). They should bring field radios to facilitate travel amongst each of these different positions. By doing this, the Reaper will always have itself wide open to at least one player whilst being distracted by the others. The Reaper can be further distracted with flares, fireworks, and radioactive ammo.
Reapers are immune to remote hacking and EMPs, it therefore cannot be turned friendly nor experience a shutdown. Players should avoid bringing EMP items & ammo as well as skill-sets built around remote hacking.
Always attack the Reaper from range. Its weapons will be less accurate, it will not be able to use any of its numerous close-quarters attacks, its components will be easier to hit, and the thermobaric explosion will be easier to outrun. Tar ammo will also considerably slow down the Reaper, which can be helpful in avoiding its rush attack and even delaying thermobaric explosions and lengthening staggers.
It is very advisable that the shield emitters be taken out first. Absolutely no damage to the Reaper can occur whilst the shield is up, so they are best dealt with by waiting for the shield to go down and then shooting them with AP ammunition. The best weapon of choice for this is the Experimental PVG. Note that even after all the shield emitters are destroyed, the Reaper's shield will still activate as it performs thermobaric explosions, but it will otherwise no longer be accessible to the machine.
After the shield is down, the HMG can be targeted next because it is capable of taking out players in a single burst and has a very high rate of fire. Since the rocket barrages from the mortar are fairly easy to avoid, it's possible to only shoot off the HMG and then stay on the move, as the Reaper will then rely on the easily avoidable barrage and the easily blocked thermobaric explosion. Nevertheless, the fight can still go well without destroying the HMG, and it takes a lot of hits to destroy anyway.
Because of the thermobaric explosion, it is most efficient to confront the Reaper near cover. The thermobaric explosion checks that the player's shoulders are exposed. If they are, the explosion will deal damage. If they aren't, the explosion will do nothing. This means that standing sideways against a tree will cover your shoulders and make you take no damage from the explosion. When the Reaper starts blaring its alarm, there is still time to get some damage in. Only when it starts releasing gas should the player run to cover. 3-4 Seconds after it is done emitting gas, the explosion will kill everything that is within range (the range of the explosion is higher than that of the visible gas beforehand). After the explosion, the Reaper will call in several Runners as backup. They can either be dealt with before continuing the fight or by shooting at the Reaper with an experimental KVM59, which will destroy the Runners with its chain lightning. Either way, they should be destroyed soon, for their micro-missiles can be an aggravating nuisance during the fight. If any large machines enter the area, leave them alone. They will be instantly destroyed by the next thermobaric explosion if they are within range. Save that ammo for lesser machines like the aforementioned Runners.
If the Reaper is low on health (around 15%), it will start one last Thermobaric Explosion attack that will cause it to self-destruct. This final explosion is telegraphed by a different alarm sound and red smoke emerging from the Reaper as it prepares to dispense the gas. When this happens, players should close in on the Reaper, use every attack they possibly can against it, and not worry about getting killed by the explosion, as killing the Reaper before it finishes this attack will improve the loot it drops.
Trivia[]
- Translated literally, Liemannen means "The Scythe Man".
- Reapers are the only machines without any class variants.
- Reapers are the only machines that are impossible to hack.
- The rival level of Reapers is always displayed as two question marks ("??").
- The design of the Reaper is the only one based off a preexisting machine.
- An inactive Reaper can be found inside Bergfinken Research Facility in Himfjäll. (The Hellmouth). Said Reaper disappears upon escaping the facility, implying FNIX has successfully taken control of it.

